NB: This is a living document that will continue to receive refinements and updates over time. If you spot an error or something explained here is unclear, please get in touch. You can also leave a comment at the bottom of the page.
Also, everything on this page applies equally to digital and photochemical (film, etc) photography. I may use pictures of old film cameras in the illustrations, but that’s just because it’s a nice, clear way to show what I’m talking about. You’ll find the same settings on digital cameras.
What is exposure? #
When a photograph comes out too bright, too dark, or just right, that’s exposure at work. Exposure comes from the verb expose, in the sense of exposing a light-sensitive surface (digital sensor, film, etc) to light so that an image can be recorded.
Getting an image of appropriate brightness depends on getting the right amount of light to the photosensitive surface. Too little light and the image will be too dark, or underexposed. Too much light and the image will be too bright, or overexposed.
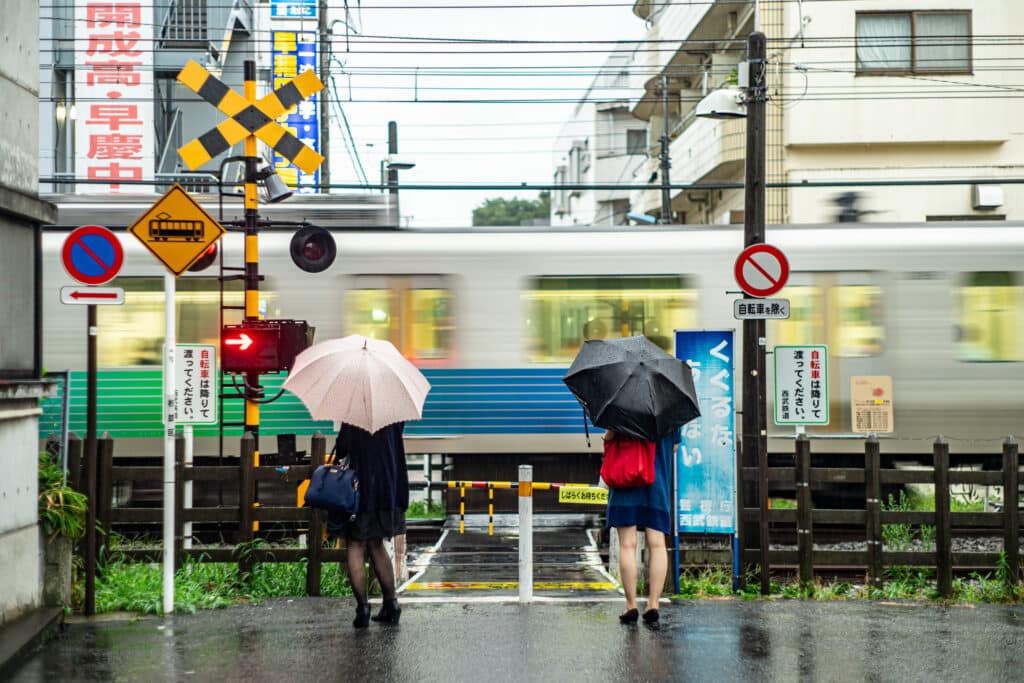
Correct Exposure

Underexposed
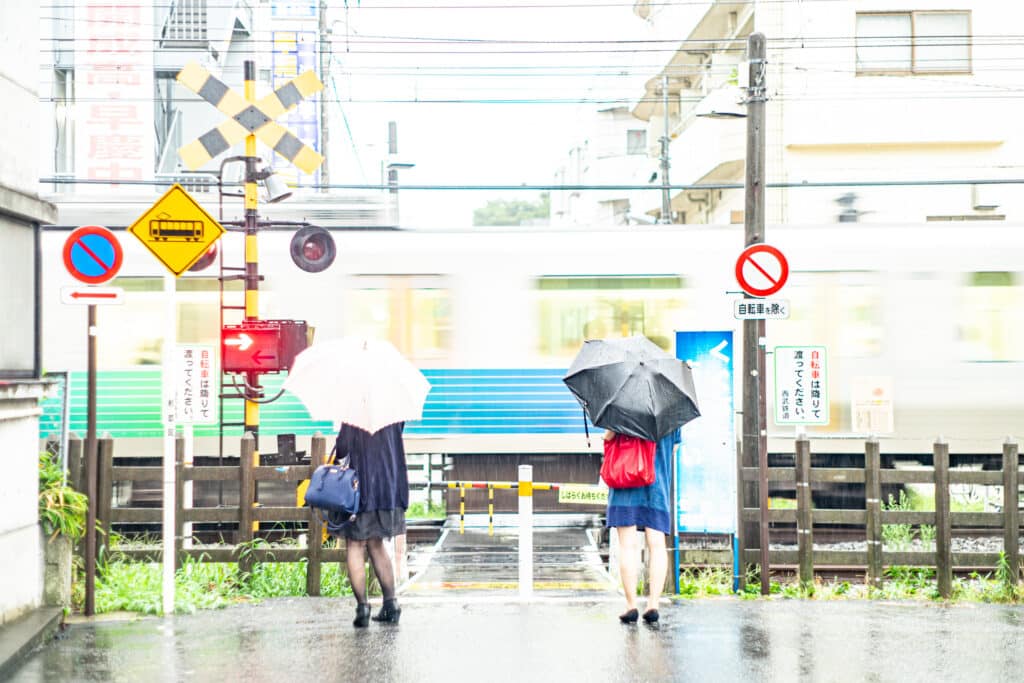
Overexposed
At its simplest, a camera is a lightproof box with a lens on one side, a sensor or film on the other side, and a shutter in between. By controlling how long the shutter remains open (shutter speed), and the size of the lens opening (aperture), we can control how much light accumulates on the light-sensitive surface.
Shutter speed and aperture are two of the three factors that make up what’s often referred to as the exposure triangle, which we’ll look at later on, with the third factor being ISO (sensitivity). The exposure triangle is a tool for helping us understand the way that the three variables relate to and affect one another.
Why does understanding exposure matter? #
To an extent, understanding exposure and how to control it used to be more important than it is now. With older materials like transparency (slide) film, the process was unforgiving. If the exposure was off by even a little, the shot could be unusable. For commercial work, messing up exposure could mean ruining an entire shoot, leading to thousands of dollars in losses.
Today’s digital cameras are extremely sophisticated, though, and very good (though not perfect) at making good exposures. RAW files are very forgiving, too, and allow us to correct for mistakes in ways that weren’t possible before. Getting exposure exactly right, in most cases, just isn’t as critical to the final product as it used to be.
It still matters, though. For one thing, the more accurate the exposure is to begin with, the less we have to manipulate the file, which helps preserve image quality. Beyond that, though, is the fact that the variables involved in exposure affect more than just the brightness of the image, and understanding how they all work together opens up many creative possibilities. As such, understanding exposure amplifies your creative potential.
Let’s Talk About Buckets #
Before we get to all the details of how exposure works and is controlled, let’s talk about filling buckets with water. Trust me on this—I promise there’s a point to it.
Imagine you have four buckets of different sizes, and you need to fill each of them with water. Bucket A holds 4 liters of water, bucket B holds 8 liters, bucket C holds 16 liters, and bucket D holds 32 liters.
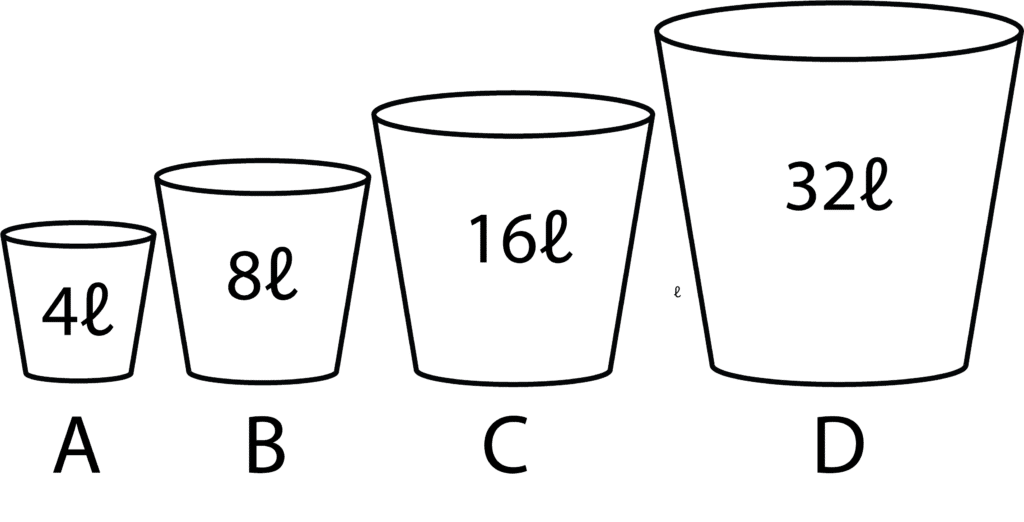
You also have a hose with which to fill the buckets. Water flows through this hose at a rate of one liter every ten seconds. Knowing that, it’s easy to calculate how long it will take to fill each bucket:
- A (4L): 40 seconds
- B (8L): 1 minute 20 seconds
- C (16L): 2 minutes 40 seconds
- D (32L): 5 minutes 20 seconds
But what if we used a fatter hose with double the flow rate? 1 liter every 5 seconds. Naturally, the time required to fill each bucket would be cut in half:
- A (4L): 20 seconds
- B (8L): 40 seconds
- C (16L): 1 minute 20 seconds
- D (32L): 2 minutes 40 seconds
And if we went the other way and had a thinner hose that had only half the flow rate of the first one? That puts us at 1 liter every 20 seconds, which would give us the following fill times:
- A (4L): 1 minute 20 seconds
- B (8L): 2 minutes 40 seconds
- C (16L): 5 minutes 20 seconds
- D (32L): 10 minutes 40 seconds
Still with me? Good. Because this is how exposure works, only instead of trying to fill buckets with water, we’re trying to get the right amount of light to accumulate on the film or sensor.
In this analogy:
- The size/flow rate of the hose correlates to aperture
- The time it takes to fill a bucket with water correlates to shutter speed/exposure length
- The size of the bucket correlates to ISO/sensitivity
Filling a bucket the right amount is a matter of accumulating the right amount of water; getting the right exposure is a matter of accumulating the right amount of light. To wind up with a correctly-filled bucket, neither overflowing nor only partially filled, you need to balance the combination of bucket volume, flow rate, and fill time. To wind up with a correctly exposed photograph, neither too bright nor too dark, you need to balance the combination of aperture, shutter speed and ISO/sensitivity.
Stop! You’ll See This Word a Lot #
Throughout this page and throughout your practice of photography, you’ll see the word stop used a lot, so it’s important to define it up front. In photography, the term stop is used to indicate a specific amount of change in things like an increase/decrease in light, a smaller or larger aperture (lens opening), or a faster or slower shutter speed. In every case, a difference of one stop means either a doubling or halving of something. For example:
- If your shutter speed changes from 1/60 of a second to 1/125, your new shutter speed is a stop faster. The shutter is open half as long and it lets in half as much light. If, instead, you go from 1/60 to 1/30, your new shutter speed is a stop slower, meaning it’s open twice as long and lets in twice as much light.
- If you change your aperture from f/8 to f/11, you’ve closed down your aperture by one stop, meaning the opening is only half as large and half as much light is getting through. If you change your aperture from f/8 to f/5.6, you’ve opened up your aperture by one stop, meaning the opening is twice as large and twice as much light is getting through.
If this sounds like nonsense at this point, don’t worry. Everything will be explained. The important thing to keep in mind from here on out is this: when something in photography changes by a stop, it either doubles (2x) or gets cut in half (1/2).
The Three Variables #
ISO (Sensitivity) #
ISO is a measurement that describes how sensitive to light a sensor or film is. The higher the number, the greater the sensitivity. Likewise, the lower the number, the lower the sensitivity.
ISO numbers are on an arithmetic scale, meaning that when you double the ISO number, you double the sensitivity. The inverse is also true—when you halve the ISO number, you halve the sensitivity.
Technically, ISO functions differently between digital sensors and film, but in the vast majority of cases, the difference doesn’t really matter to the making of photographs. With film, if you switch from an ISO 100 film to an ISO 200 film, the latter is going to be twice as sensitive. Changing your digital camera’s settings from ISO 100 to ISO 200 will have the same effect on exposure, but it’s not actually changing the sensitivity. Instead, it’s boosting the amplification of the signal from the sensor. The result is the same.
The following ISO numbers represent a normal range relevant to both film and digital photography, slow (low sensitivity) to fast (high sensitivity) from left to right:
50 • 100 • 200 • 400 • 800 • 1,600 • 3,200 • 6,400
Each of these ISO numbers represents a specific sensitivity to light.
Look at ISO 800 in the illustration below, more or less in the middle. It represents 2x the sensitivity of ISO 400, but only 1/2x the sensitivity of ISO 1,600. There is a 1-stop difference between ISO 400 and ISO 800, and also between ISO 800 and ISO 1,600, and so on.
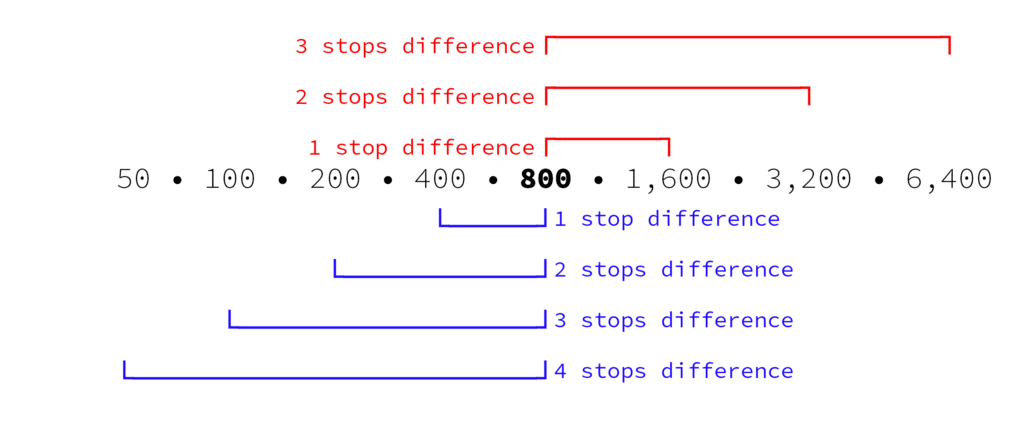
If we go expand to a 2-stop difference, that gives us ISO 200 on one side (1/4x the sensitivity) and ISO 3,200 on the other (4x the sensitivity).
NB: You may often see the terms faster and slower in photography discussions, most often relating to ISO, aperture, and shutter speed. Here, a faster ISO is a higher one (more sensitive, requiring less light), and a slower ISO is a lower one (less sensitive, requiring more light).
Intermediate ISO values are usually set at 1/3 and 2/3 of a stop. You mostly won’t run into these values very often, but here are a few as an example:
50 • 64 • 80 • 100 • 125 • 160 • 200 • 250 • 320 • 400
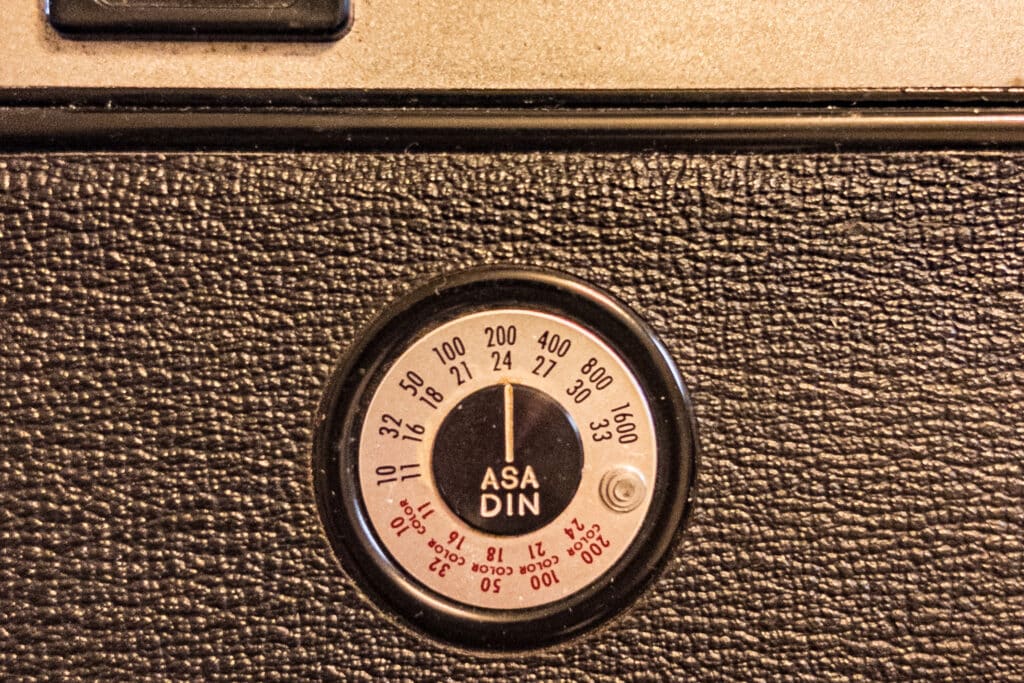
You may also see ASA or DIN used to represent film sensitivity in older materials or marked on older film cameras. For all practical purposes ASA and ISO are the same, and ASA was the default in the USA before everyone standardized on ISO. DIN was an old standard used in Europe. Read more here.
Shutter Speed #
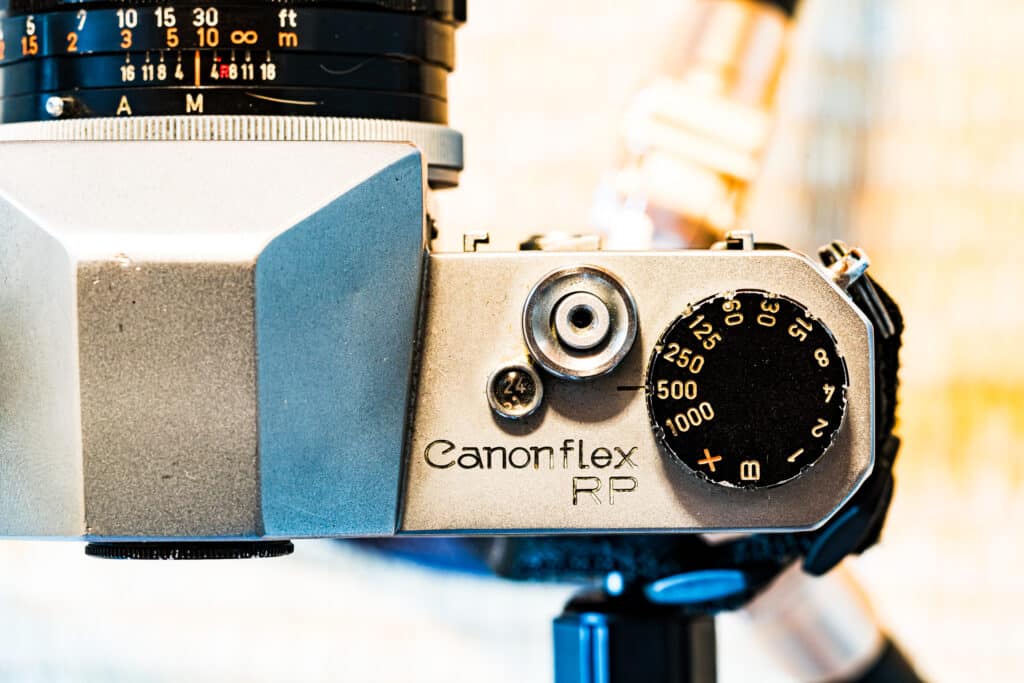
Usually in the camera body, but occasionally in the lens, there is a shutter. This is a light-tight door of sorts, a device that allows light to pass through for a precise amount of time. Shutter speed is the measurement of how long the exposure is. It can vary from a tiny fraction of a second to a period of minutes or even hours. Shutter speeds of less than one second are typically expressed as a fraction. Standard, whole-stop shutter speeds are as follows:
1/2 • 1/4 • 1/8 • 1/15 • 1/30 • 1/60 • 1/125 • 1/250 • 1/500 • 1/1000 • 1/2000 • 1/4000
As you can see, each step represents a 1-stop difference, with adjacent speeds being half or twice as long, letting in half or twice as much light, respectively. And this range would be pretty typical on most contemporary digital cameras. A few might have faster shutter speeds than 1/4000, but not many. Most will have slower shutter speeds as well that extend from 1 second to around 30 seconds. The full shutter speed range of many cameras would therefore be:
30s •15s • 8s • 4s • 2s • 1s • 1/2 • 1/4 • 1/8 • 1/15 • 1/30 • 1/60 • 1/125 • 1/250 • 1/500 • 1/1000 • 1/2000 • 1/4000
There are some exceptions, mostly with older film cameras, but these are the standard whole-stop shutter speeds. These are the ones you should know. Your camera may also give you the option to set shutter speeds in 1/2-stop or 1/3-stop increments, but you don’t need to worry about memorizing those.
As with aperture, shutter speeds are often referred to as fast or slow. In the list above, 1/2 and 1/4 would be rather slow shutter speeds, whereas 1/2000 and 1/4000 are quite fast. When you change your shutter speed, you select a shutter speed that is either faster or slower than the one you started with. We also use this in relative terms: compared to 1/60 of a second, 1/30 is a slower shutter speed, and 1/125 is faster.
In addition to the speeds shown above, you may see shutter settings on your camera like B (bulb) or T (time). These are used when making long exposures over 30 seconds (or whatever the maximum shutter setting is on the camera). These settings are typically used with the camera on a tripod and with a shutter release cable or remote control to help prevent vibrations that would otherwise blur the photo.
On newer digital cameras, there is often the option to use an electronic shutter instead of the mechanical (physical) shutter. Both mechanical and electronic shutters have their mix of advantages and disadvantages, but for our purposes here with exposure, it makes no difference which you use.
Aperture #

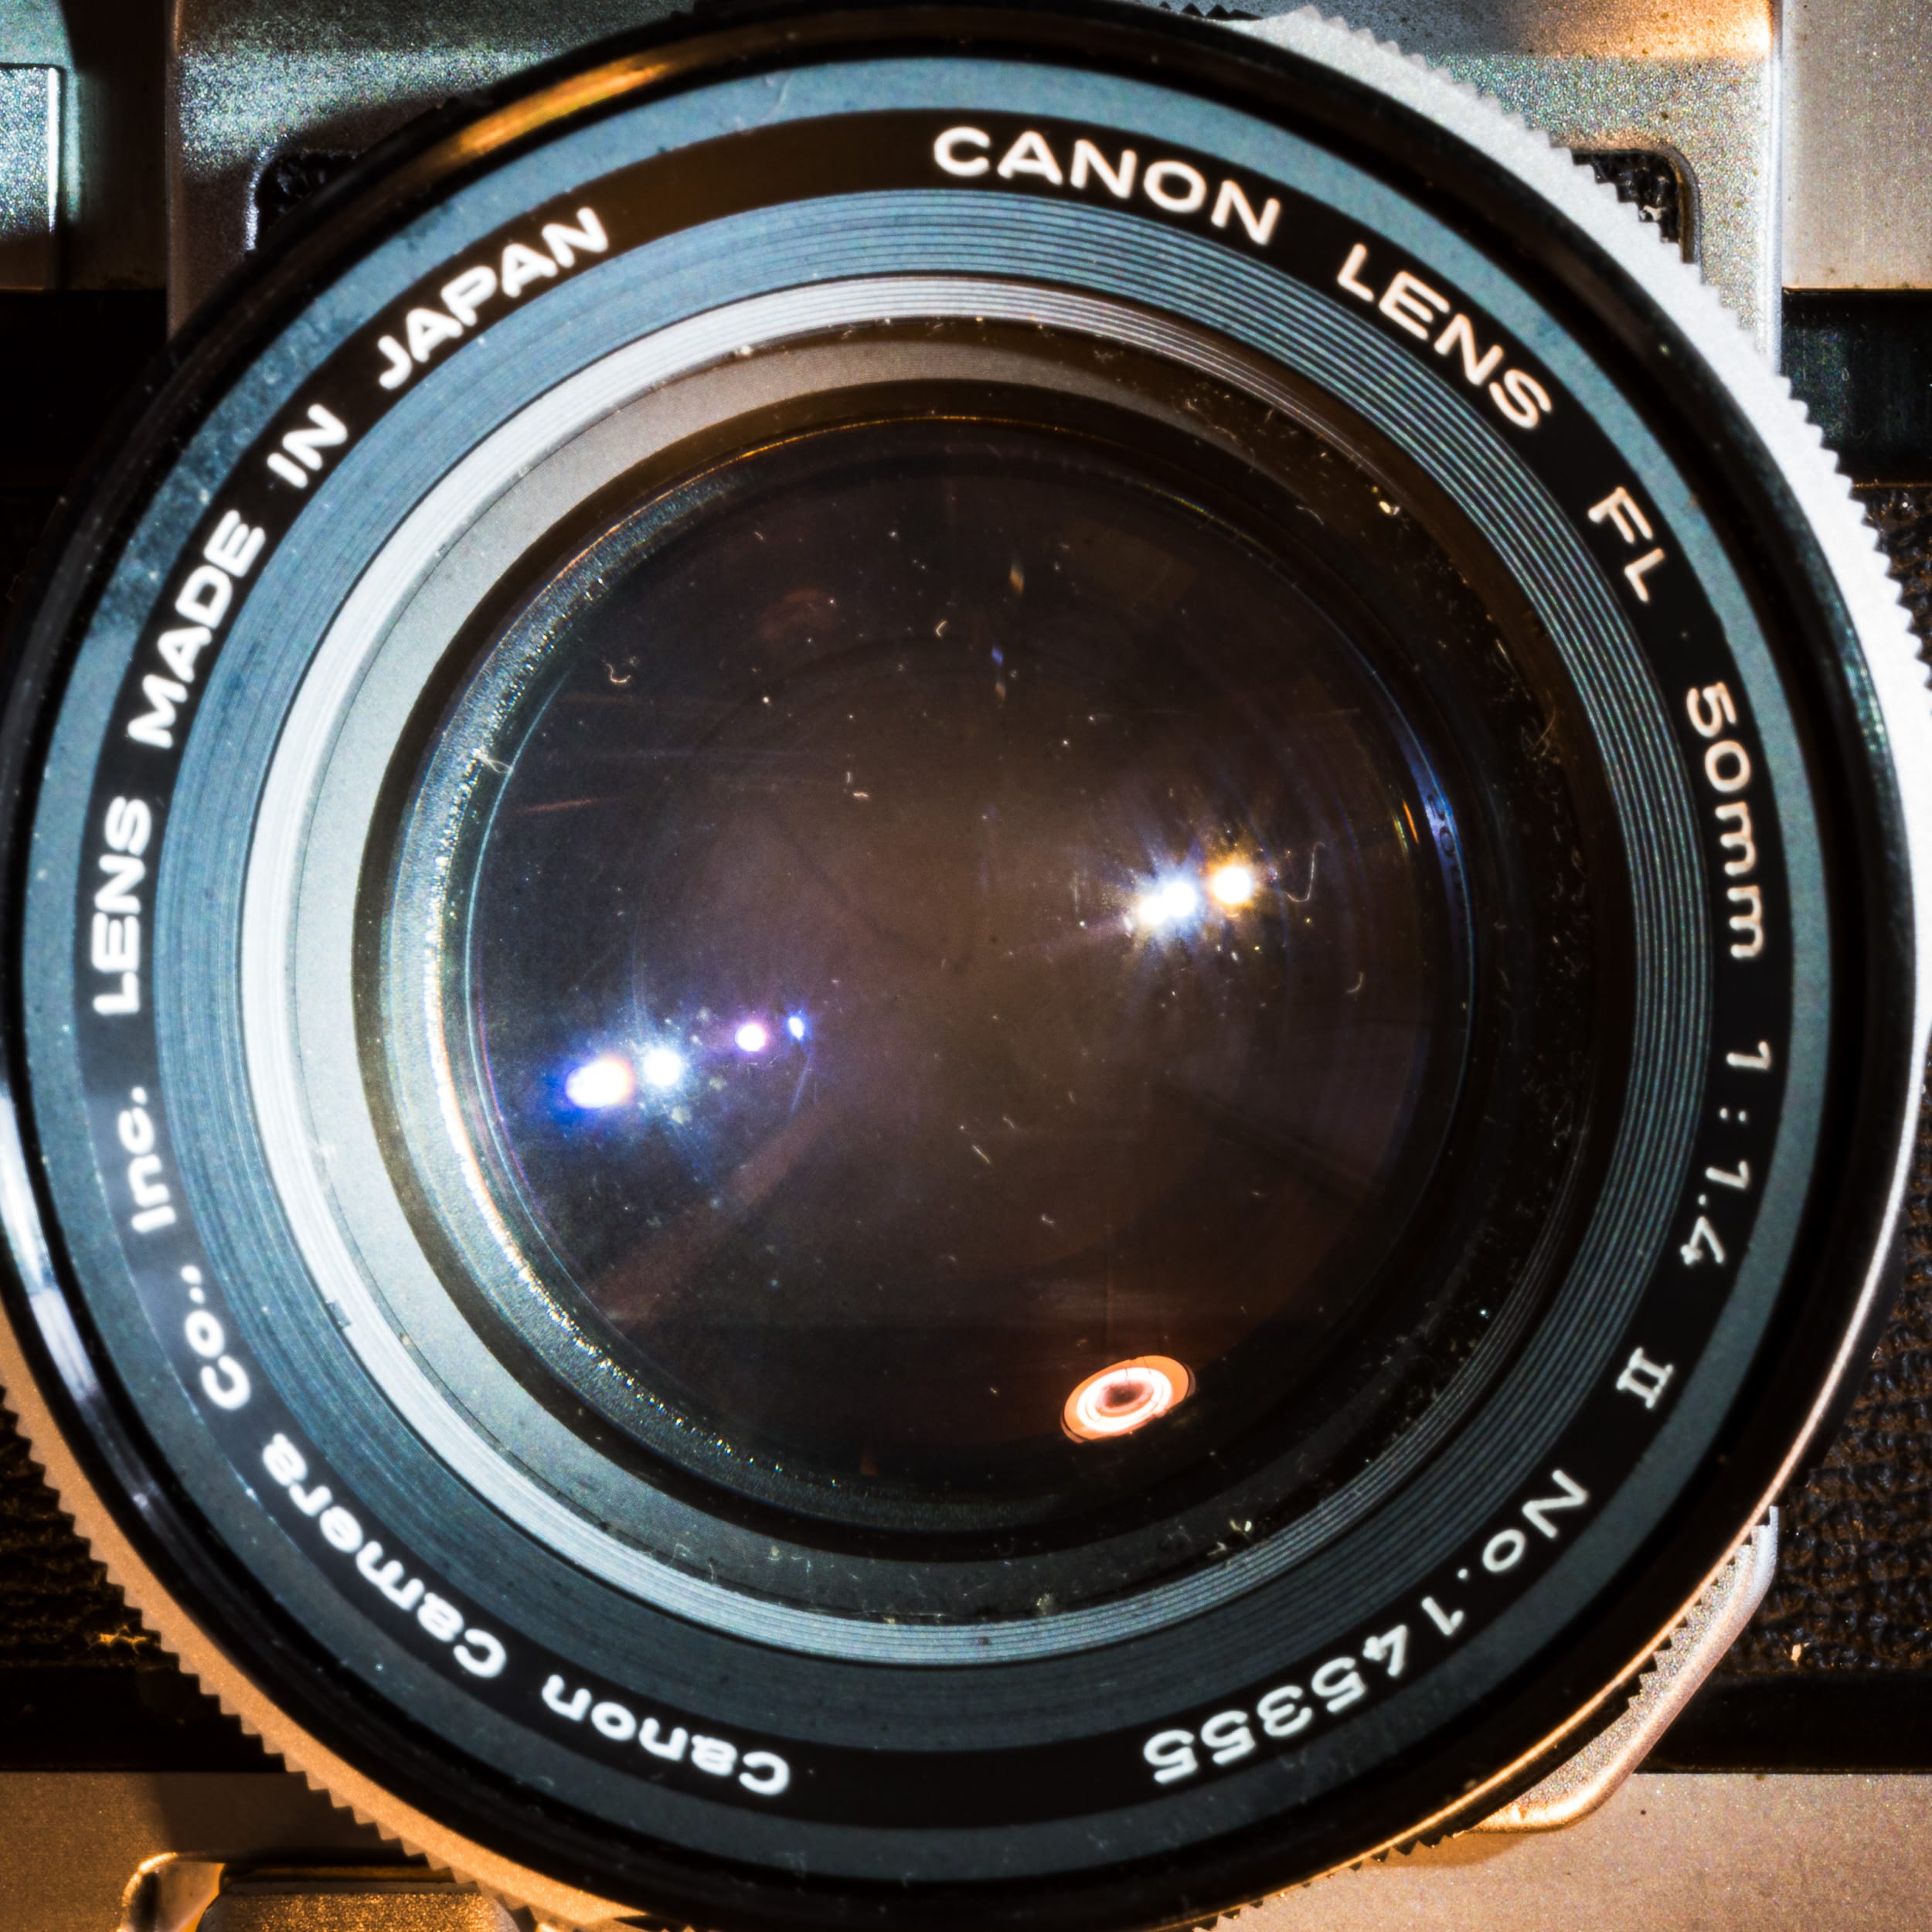
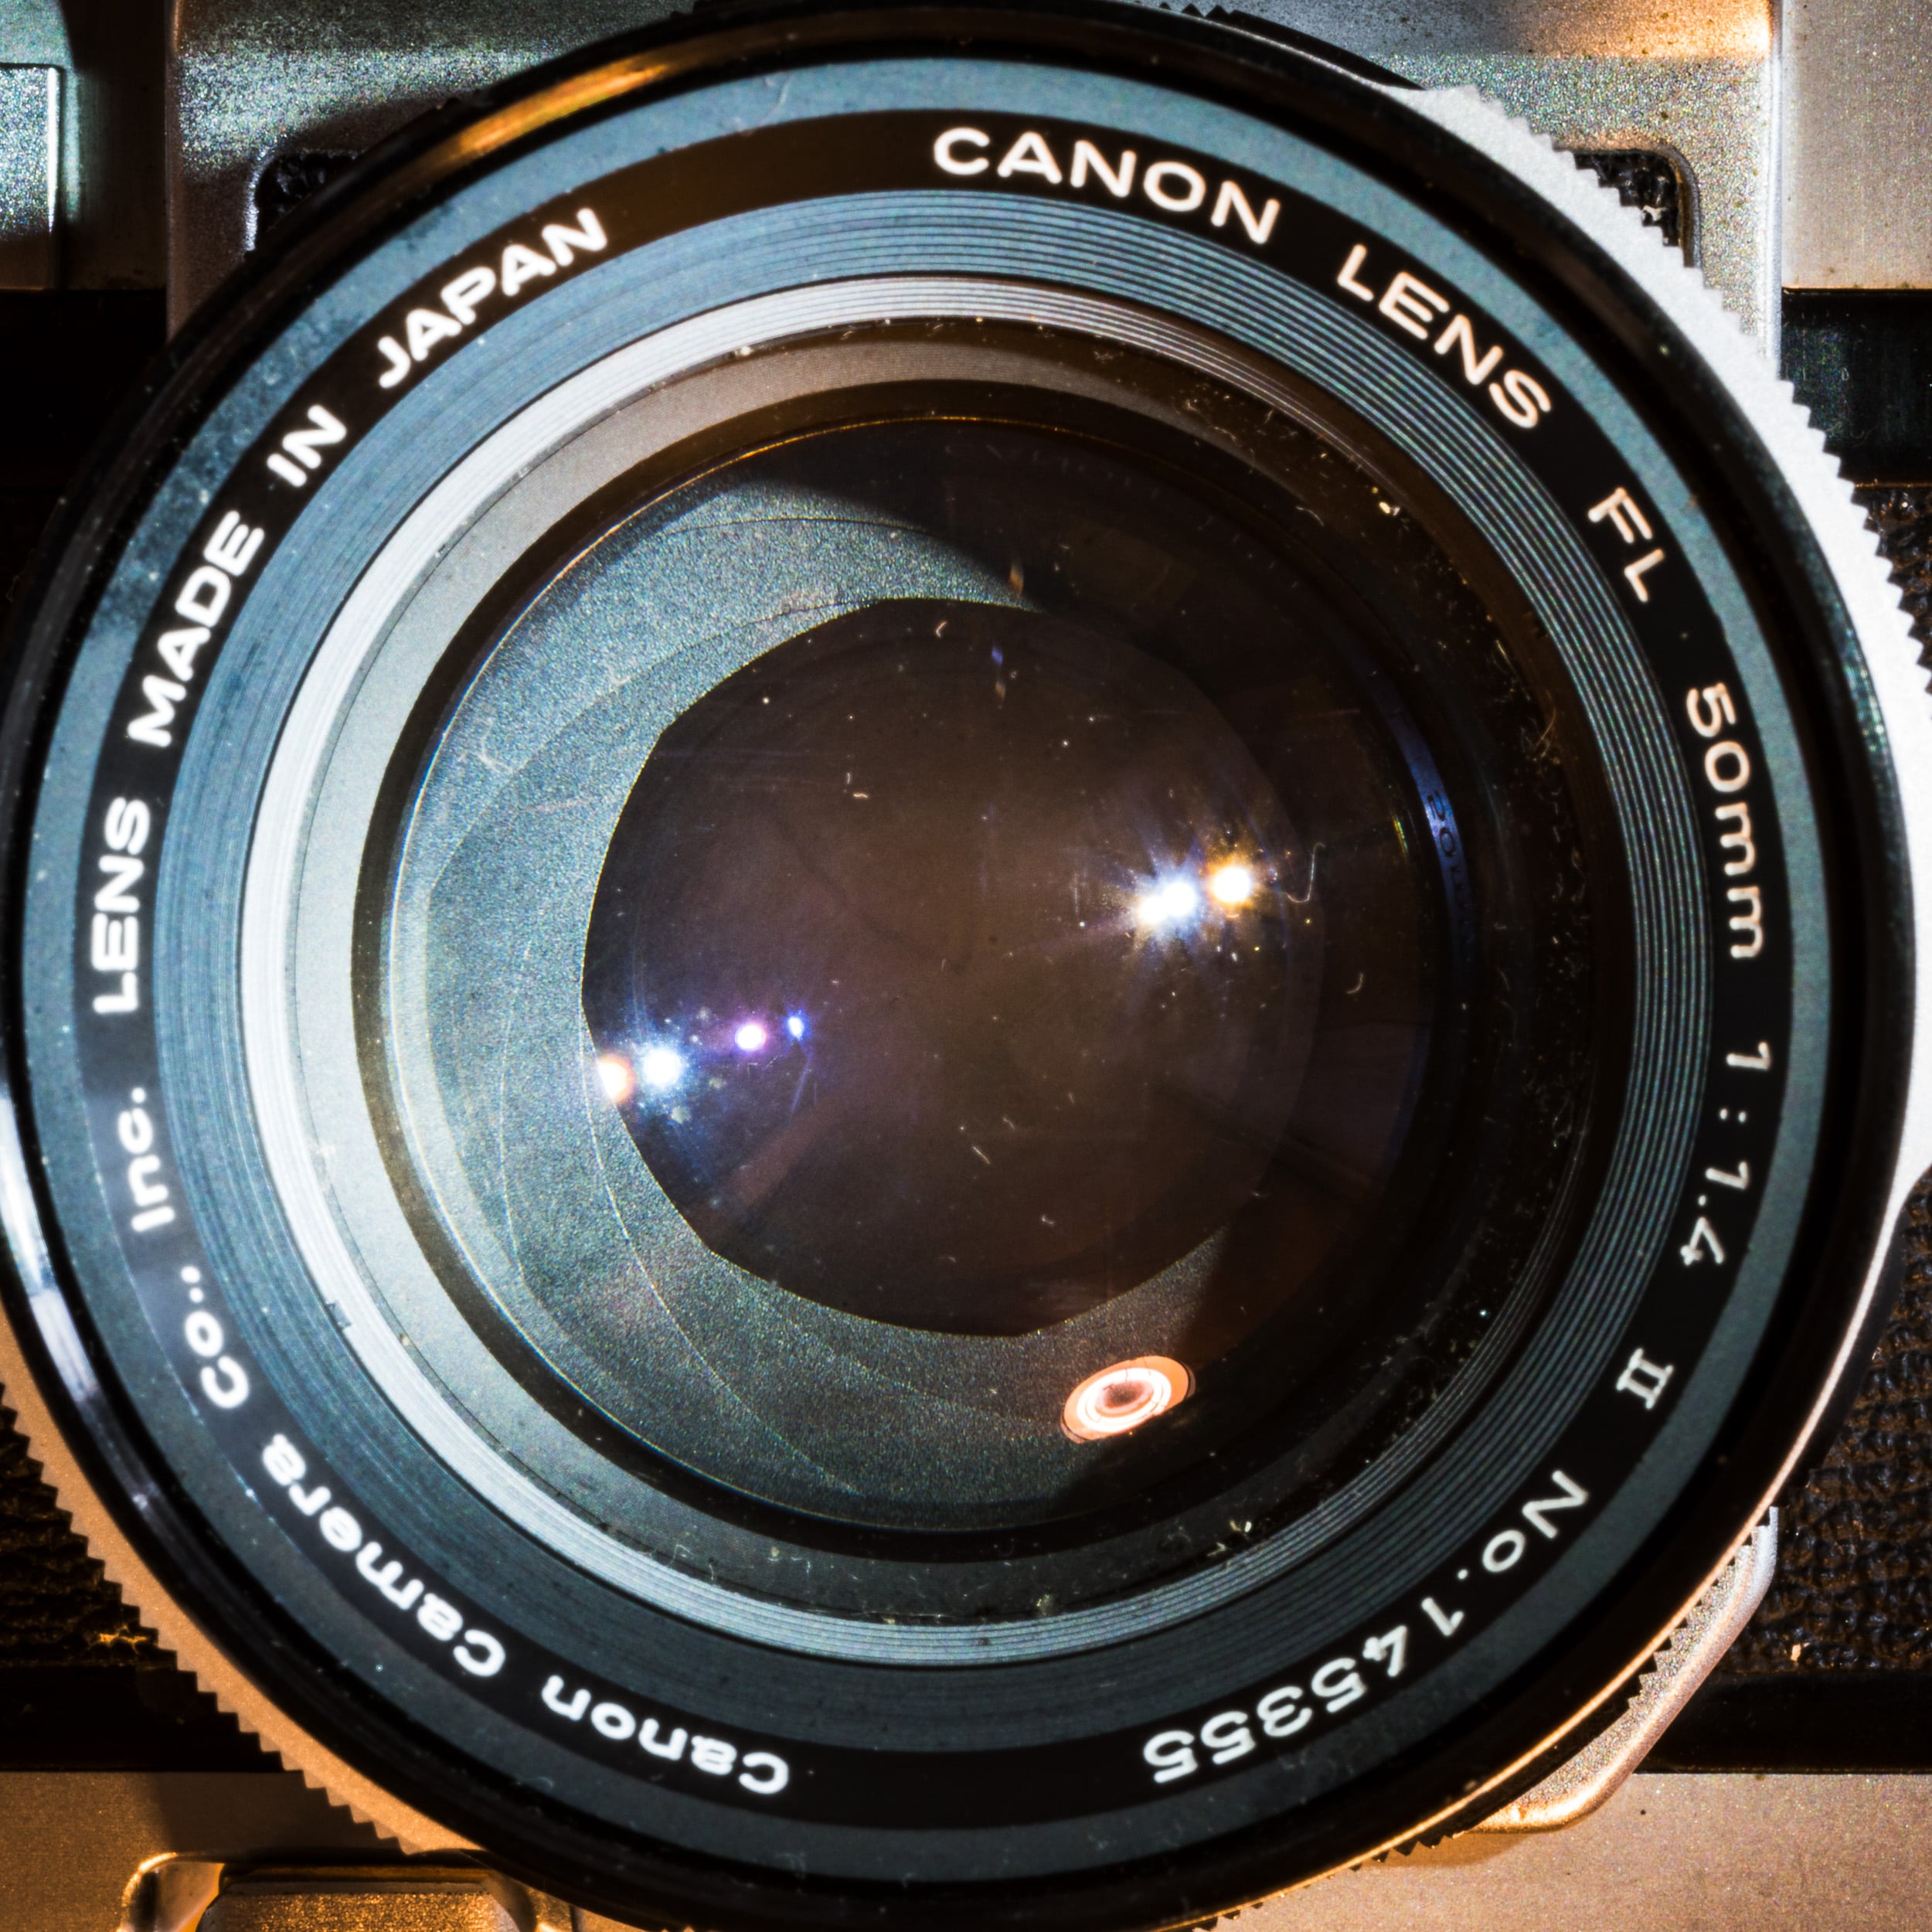
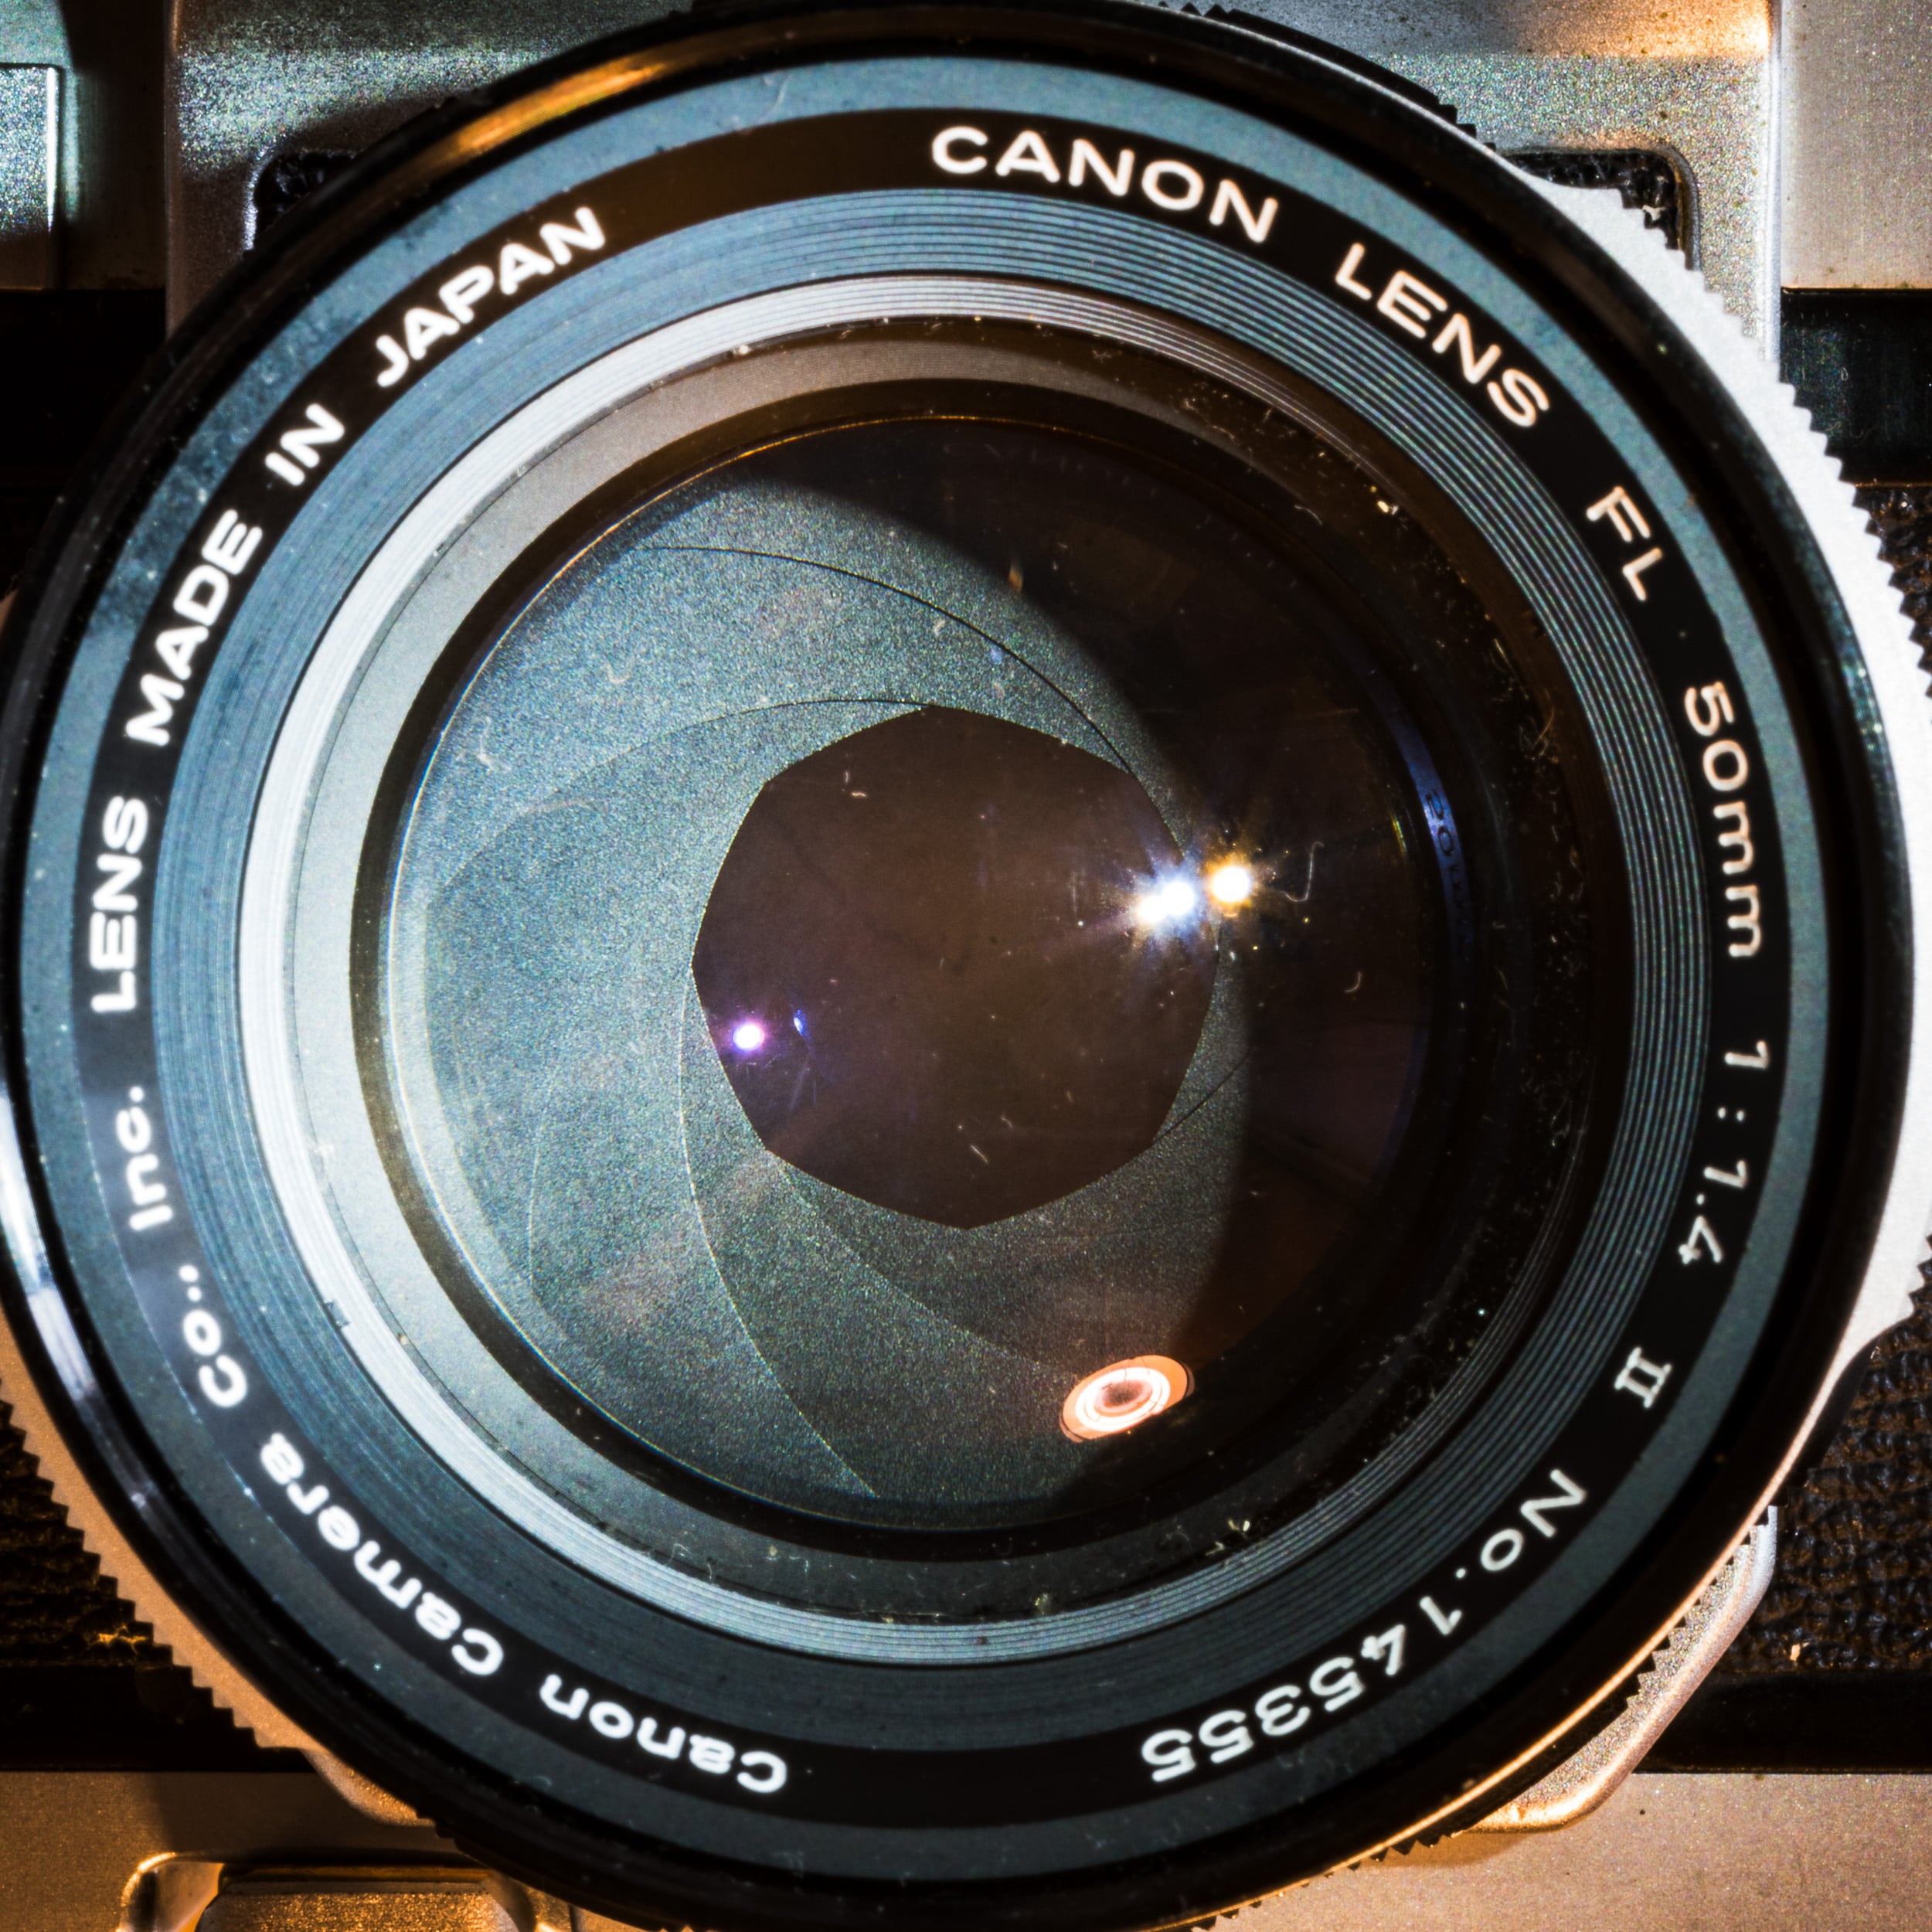
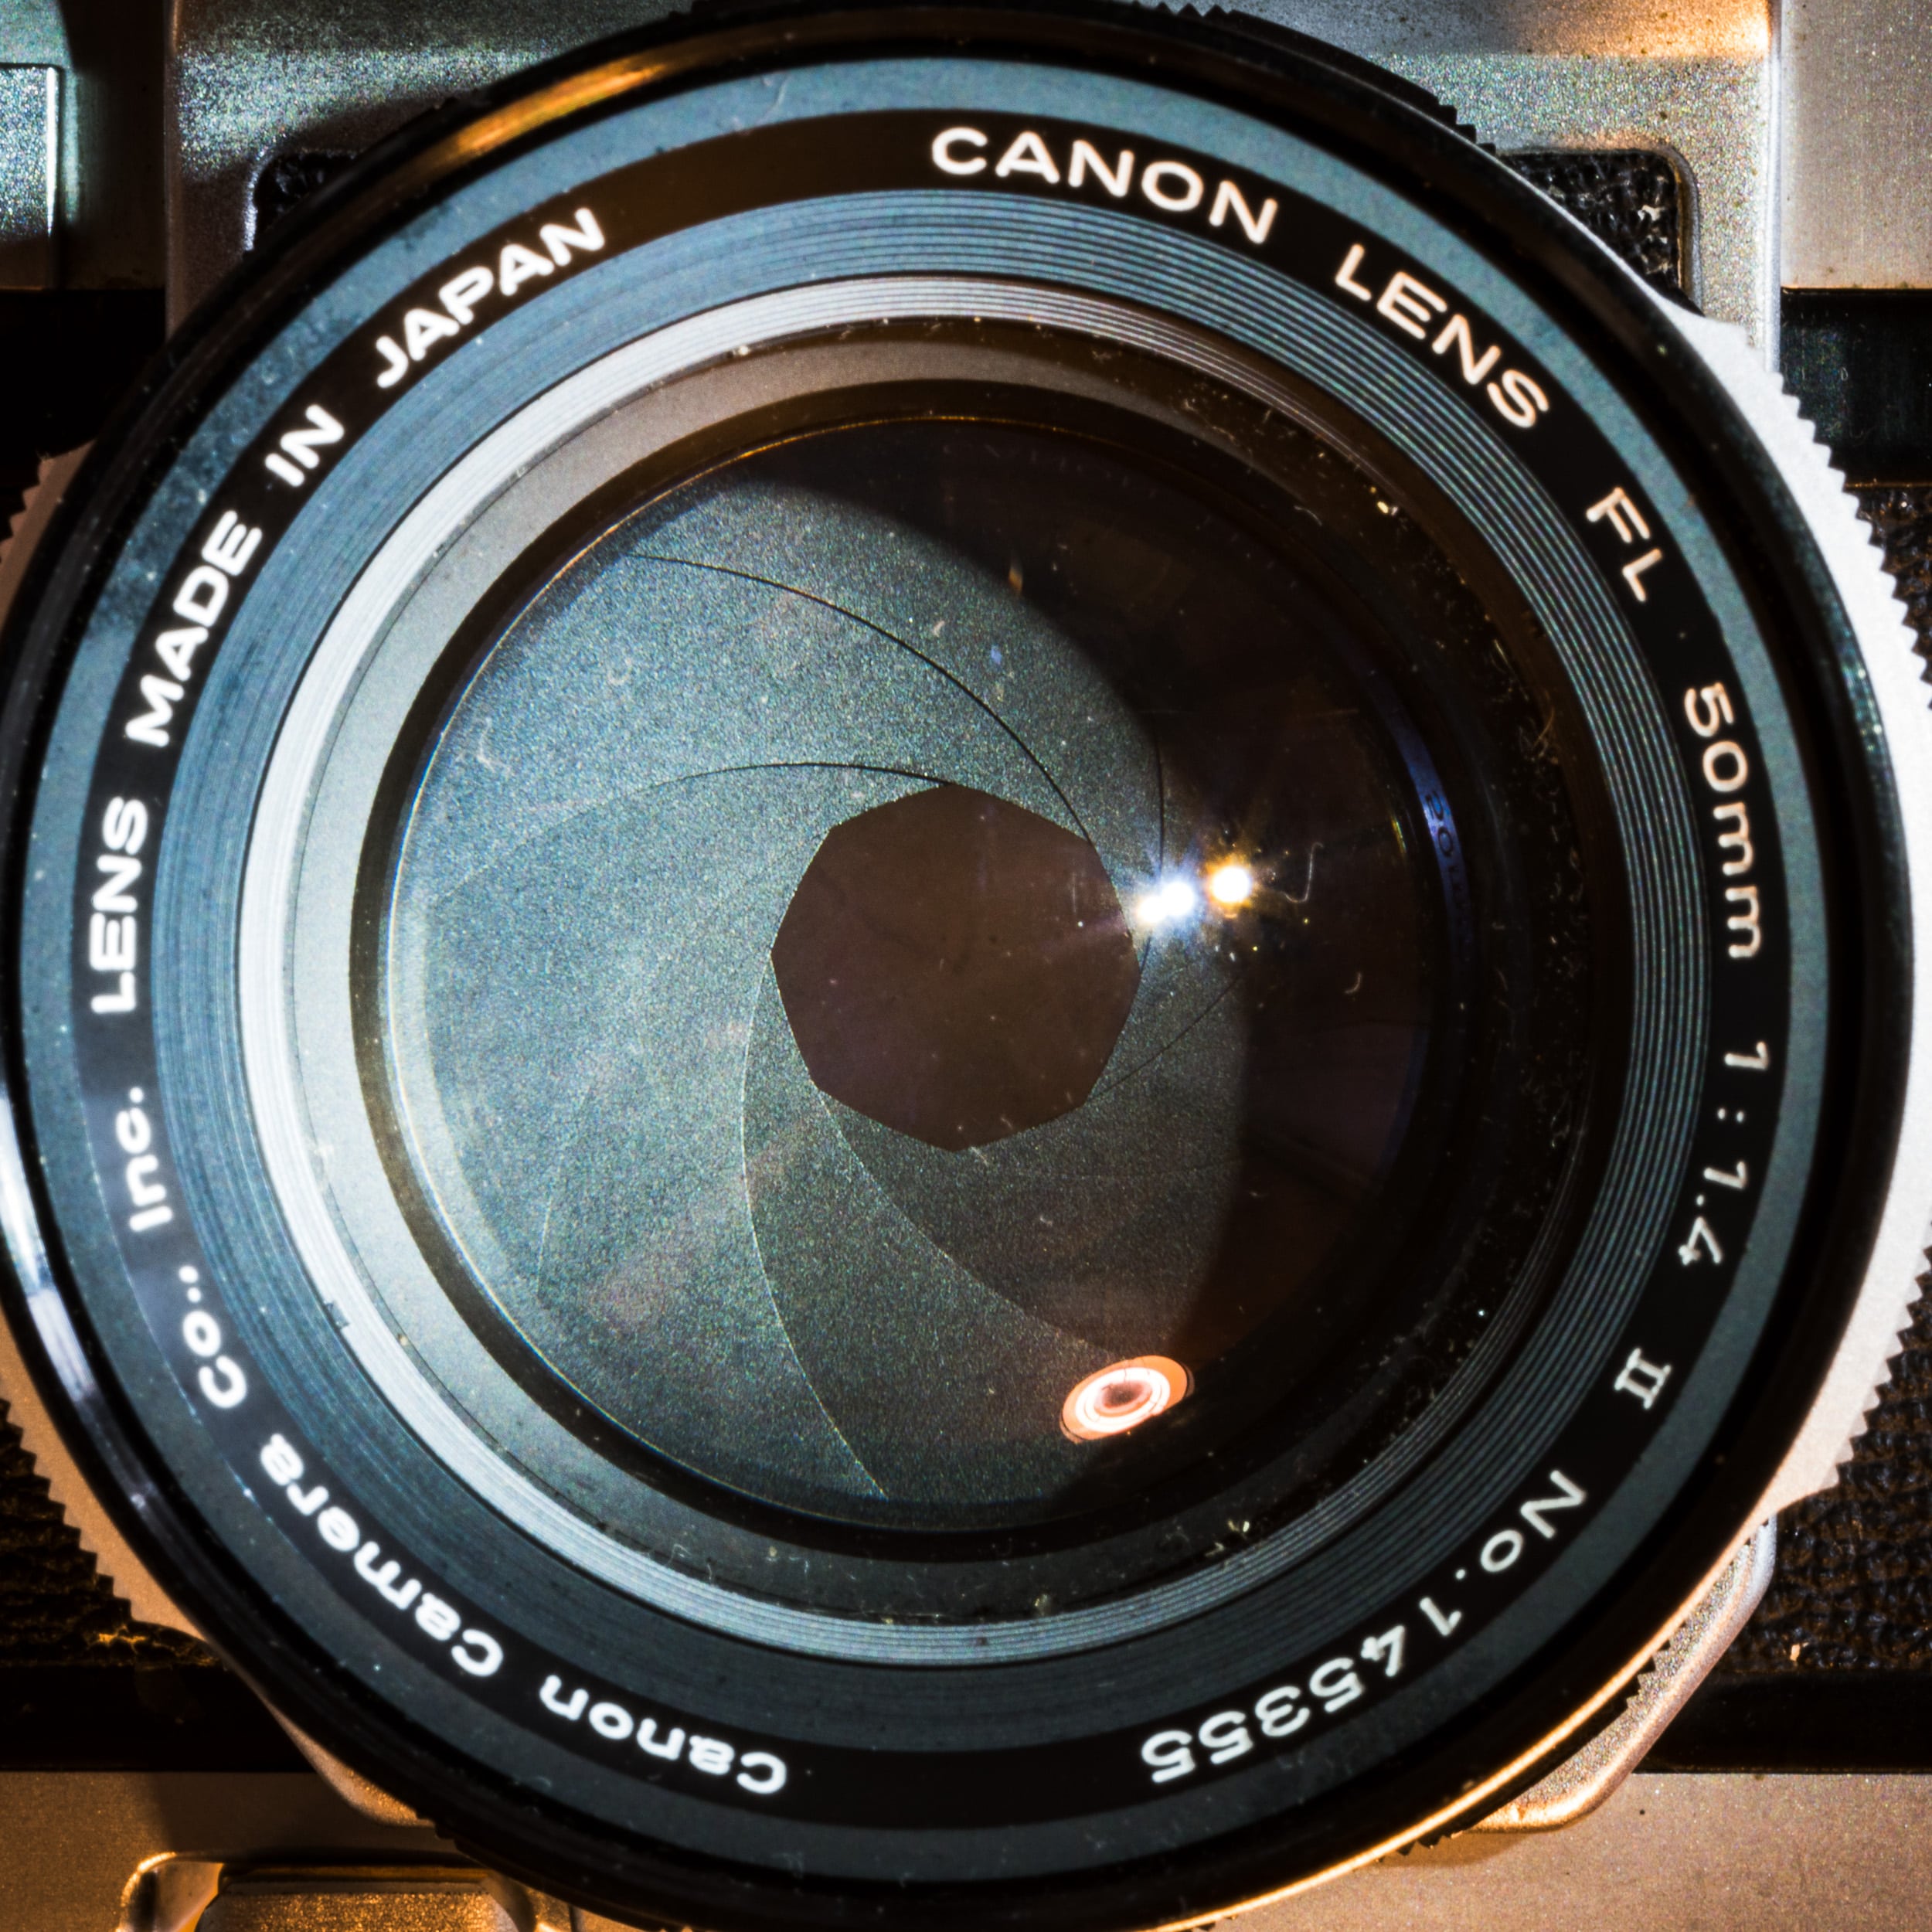
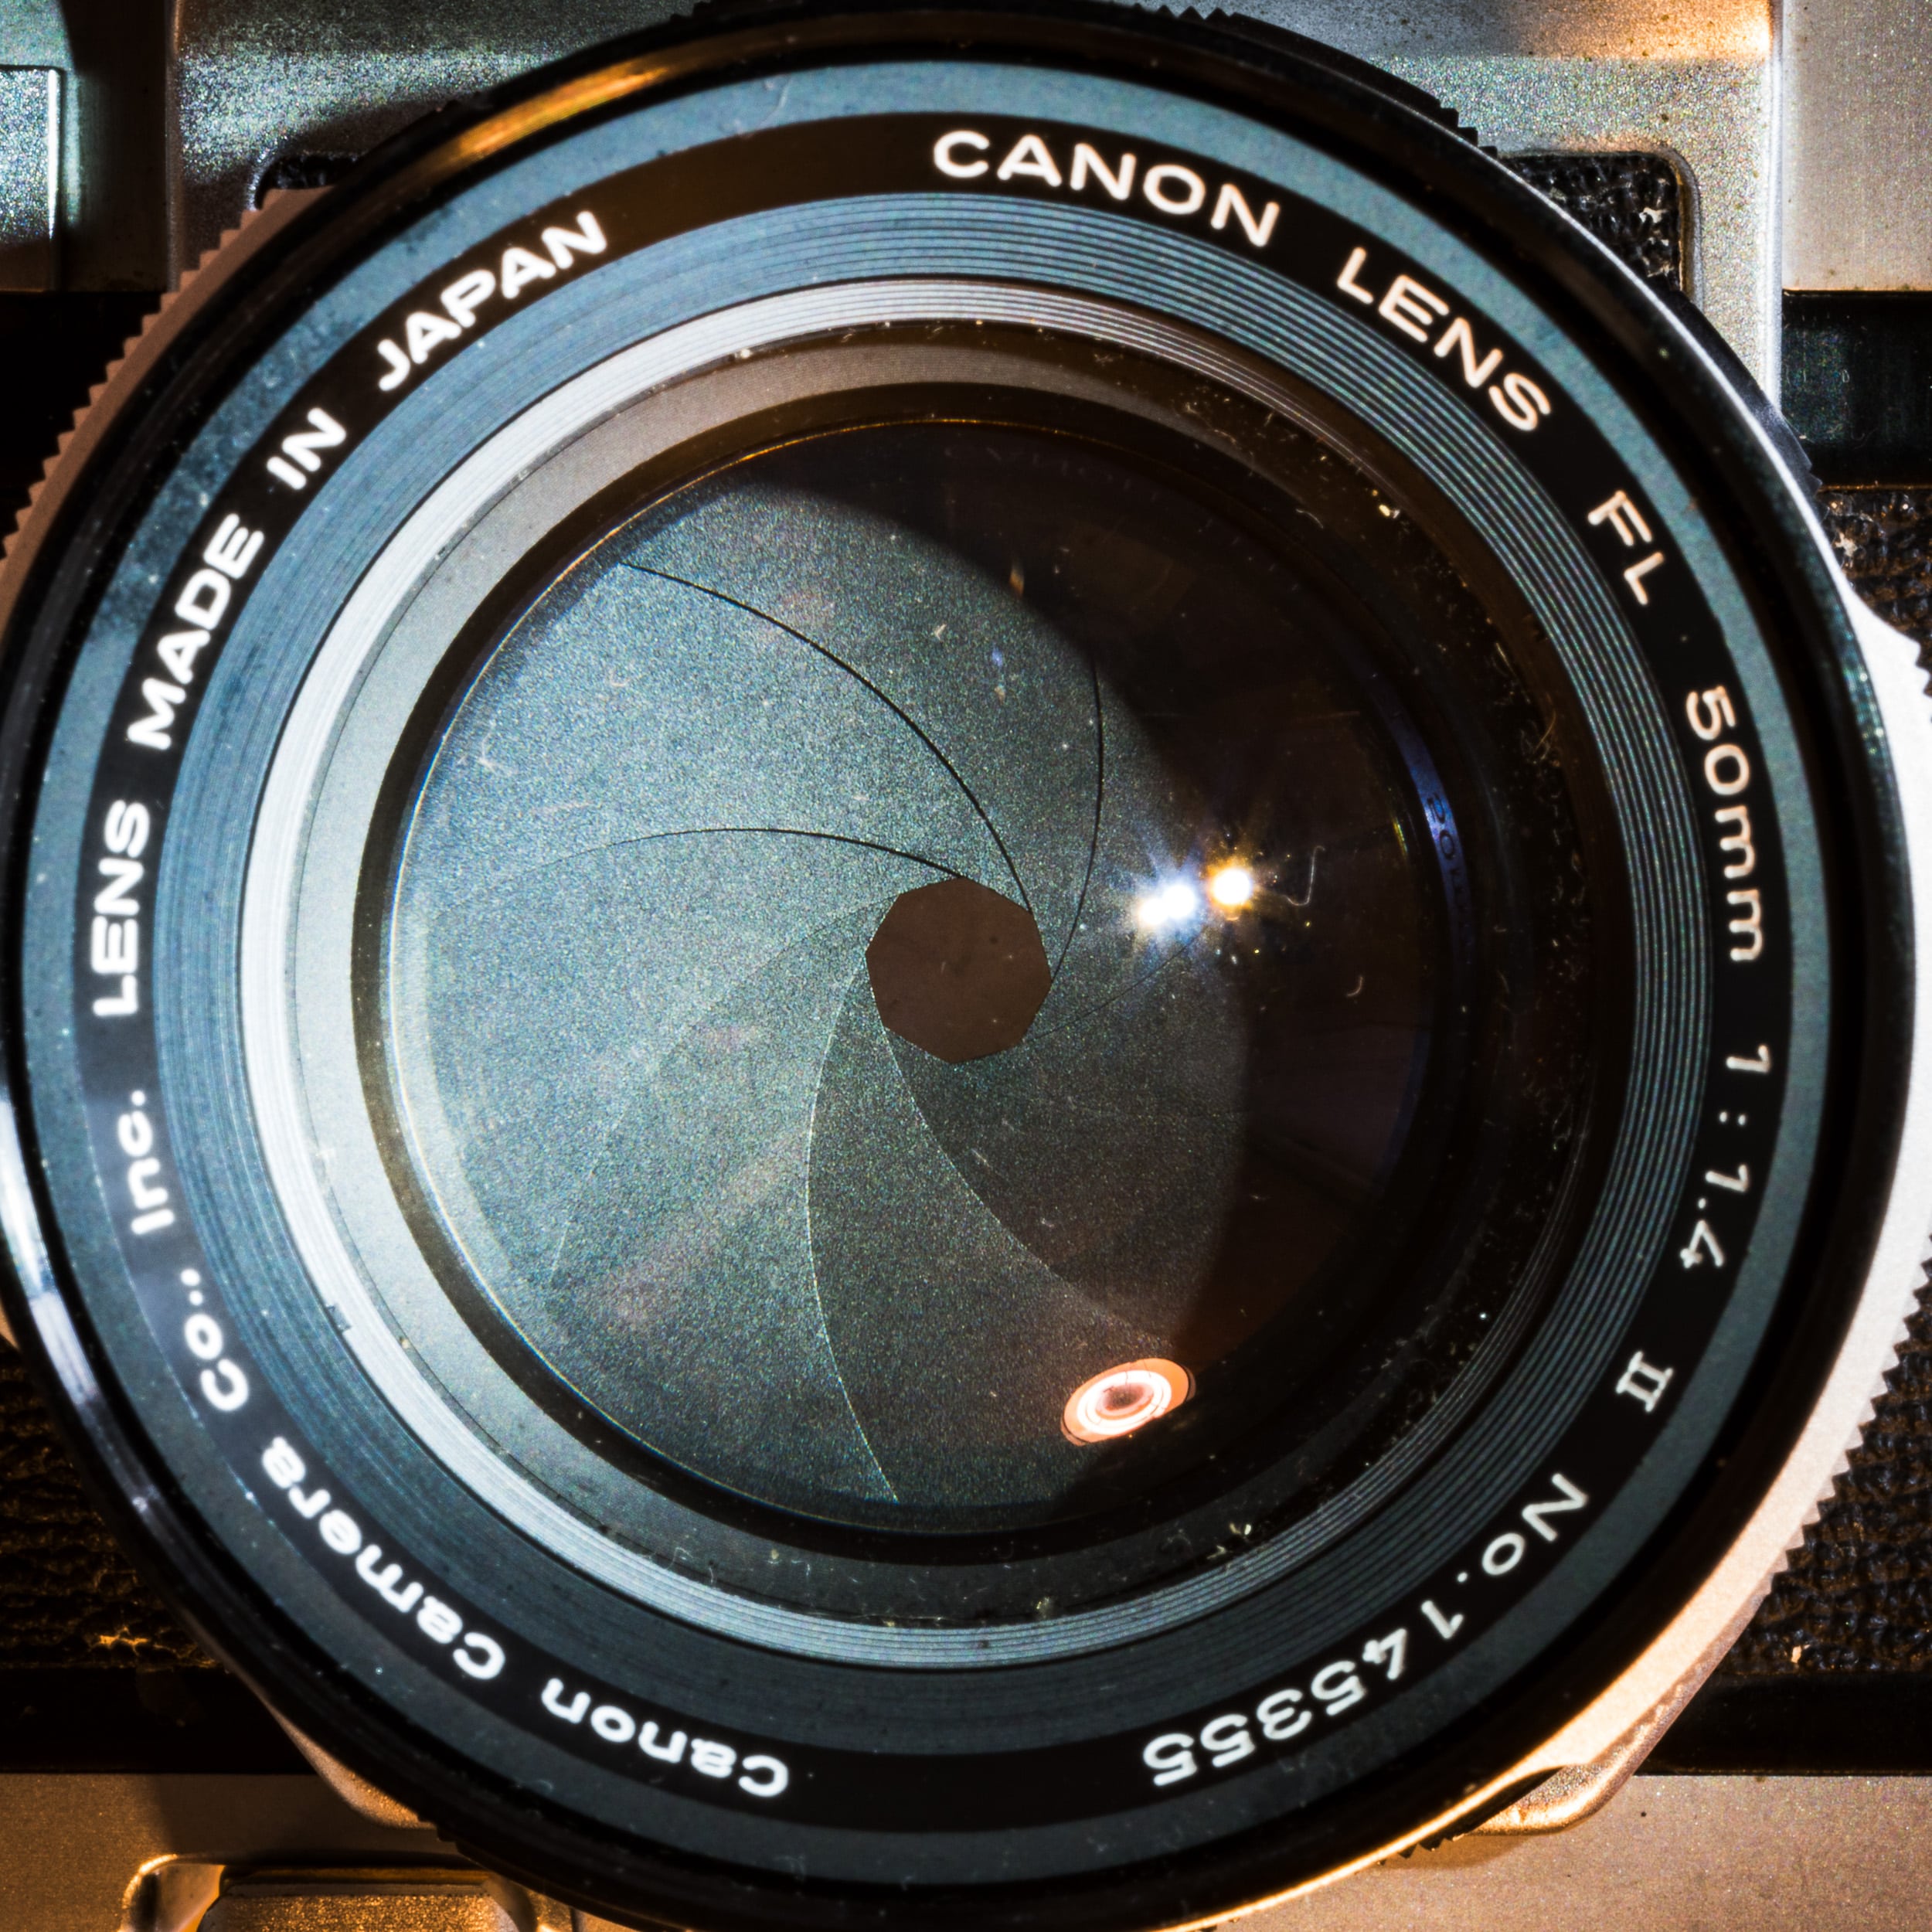
Aperture refers to the size of the opening in the lens that regulates how much light comes in. It is controlled by a physical iris built into the lens that can be opened or closed to varying degrees. The term iris refers to the physical structure of blades (A) that opens and closes, whereas the aperture is the opening in the center of the iris (B). In addition to regulating how much light comes through, the aperture setting also affects depth of field, but in this article we’ll focus exposure.
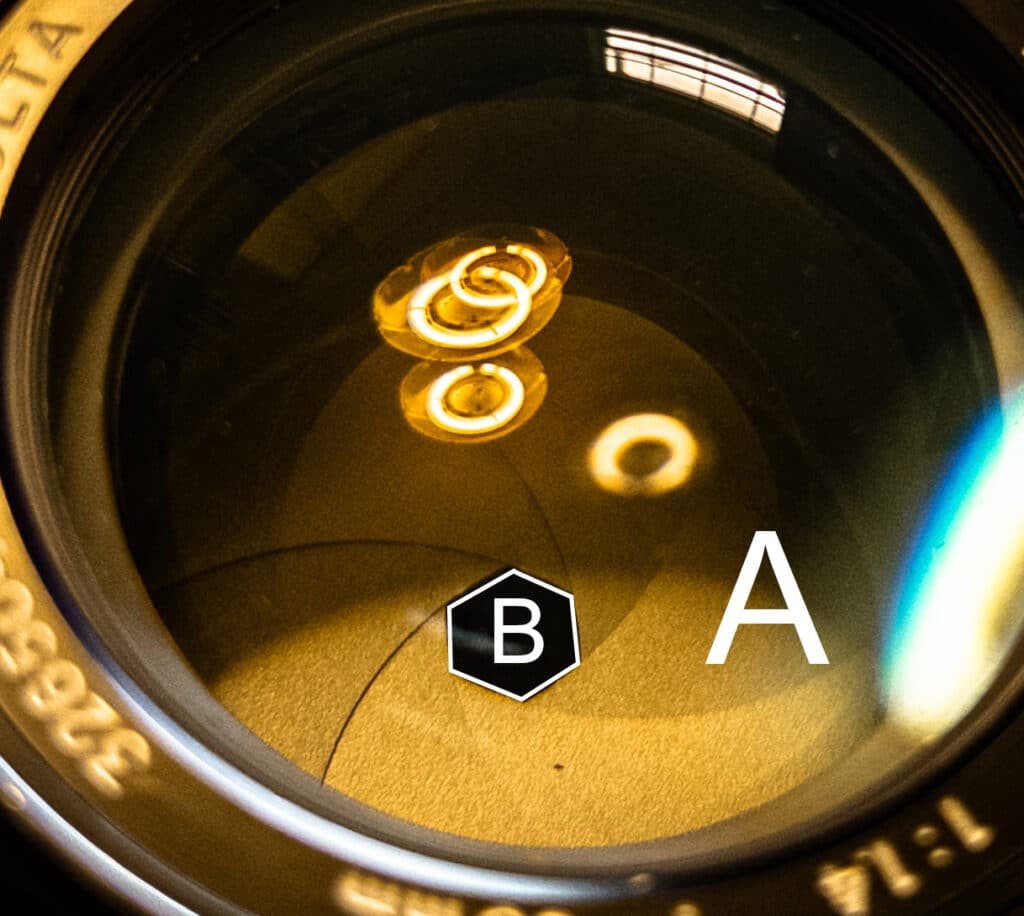
When the iris is open all the way and the aperture is at its largest, this is the lens’s maximum aperture, often referred to as wide open. When the iris is closed down as far as it can go and the aperture is at its smallest, this is the lens’s minimum aperture. In most situations, we end up using settings somewhere in between.
F-Stops and Stops #
Confusingly, the numbers we use to refer to specific apertures are called f-stops. F-stops are different from stops in the way that we’ve used the word up to now on this page, but they are still related.
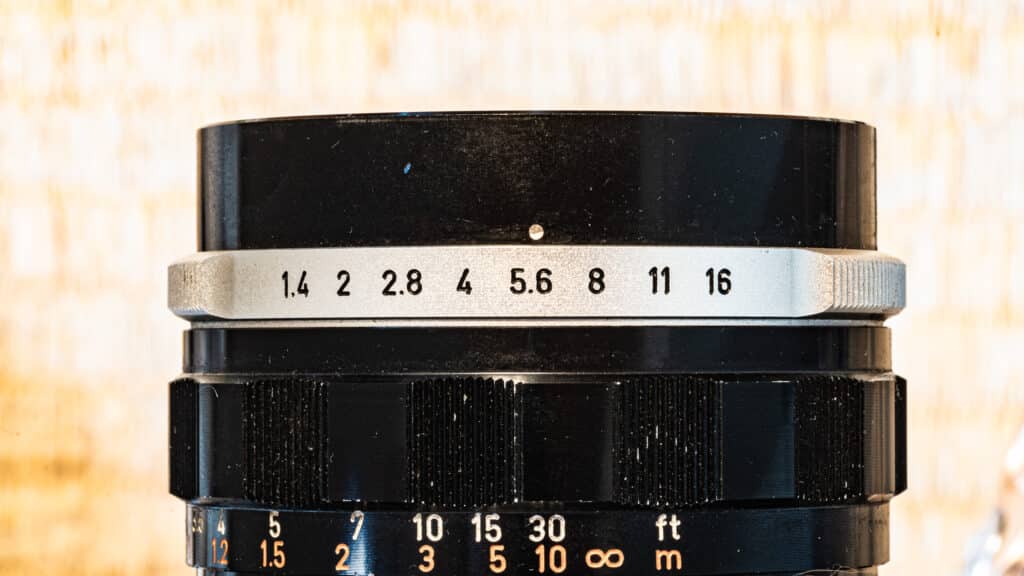
This picture shows the barrel of a camera lens, with the aperture ring in silver. The ring shows the f-stops of the lens, with a maximum aperture of f/1.4 and a minimum aperture of f/16. In the picture, the lens is set to f/5.6. You’ll notice that the progression of numbers is not as straightforward as with ISO and shutter speed, though. The numbers are not a simple halving or doubling of the adjacent value. However, each f/stop on that aperture ring still represents a difference of one stop.
With the lens set at f/5.6, if I open up to f/4 I’m letting in 2x as much light. If I open up to f/2.8 it’s 4x, at f/2 it’s 8x, and at f/1.4 there’s 16x as much light coming through compared to at f/5.6. Going the other way, f/8 is going to let in 1/2x as much light, f/11 will let in 1/4x, and f/16 will let in 1/8x.
Some lenses have a larger maximum aperture than f/1.4, and many lenses have a smaller minimum aperture than f/16 (usually f/22 or f/32). Most lenses you see will have settings within that range. A more complete list of apertures that do exist on lenses out in the world is as follows:
f/1 • f/1.4 • f/2 • f/2.8 • f/4 • f/5.6 • f/8 • f/11 • f/16 • f/22 • f/32 • f/45 • f/64 • f/90 • f/128
The typical range is in bold. Unless you get into specialized (and often expensive) lenses, you probably won’t have a lens that open’s up wider than f/1.4, or closes down past f/32. They do exist, though.
As with ISO and shutter speed, we also use the terms fast/faster and slow/slower when talking about aperture. A faster aperture lets in more light, whereas a slower aperture lets in less. f/4 is a faster aperture than f/11, and f/8 is a slower aperture than f/2. Lenses with a large maximum aperture are often referred to as a fast lenses. A 50mm f/1.4 is a fast lens, for example. A lens with a relatively small maximum aperture, like a 200mm f/5.6, would be considered a relatively slow lens.
Visualizing Aperture #
The way the aperture looks at different settings is irrelevant to exposure, but seeing the correlation between f-stop settings and the physical opening in the iris can sometimes help clarify the idea. Also, it’s cool to look at.

Interrelation of the Variables: The Exposure Triangle #

Put simply, when one or more of the three variables changes, one or both of the others must also change in order to maintain the same effective exposure. Remember: getting the right exposure means getting the right amount of light to the sensor/film, and the right amount of light is going to depend on the sensitivity of the sensor/film.
Compensating for Changes To Keep the Same Exposure #
Note: the below explanation is based on the assumption that you are controlling ISO, shutter speed, and aperture manually. Many cameras can control some or all of variables automatically. This is very convenient, but for the sake of learning and having more creative control, it’s important to understand the principles of how they are related, which is easier to discuss if they are managed manually.
Let’s say you’re out on a sunny day and your camera is set to ISO 400, your shutter speed is set to 1/500, and your aperture is set to f/16. This will give you a good exposure under normal conditions in midday sun.
But let’s say you want to change one of these settings. Let’s say that, instead of f/16, you want to shoot at f/8. If you just change the aperture to f/8 and don’t change anything else, you’ll now be overexposed by 2 stops, as f/8 lets in 4x as much light as f/16 does. So what can you do to fix this? You can:
- Change the shutter speed:
- To get back to a correct exposure, you can use a shutter speed that’s 2 stops faster. If you refer to the chart above, you’ll see that would give us a shutter speed of 1/2000, which lets in 1/4x as much light as 1/500 does. With this setting, we again have a correct exposure.
- Change the ISO:
- To get back to a correct exposure, you can use an ISO that’s 2 stops slower (less sensitive). That would give us an ISO setting of 100, which is 1/4x as sensitive as ISO 400. With this setting, we again have a correct exposure.
- Note that if you’re shooting film, you can’t change ISO mid-roll and would need to change to an ISO 100 film. This is one of the ways in which digital cameras are a bit more flexible.
- To get back to a correct exposure, you can use an ISO that’s 2 stops slower (less sensitive). That would give us an ISO setting of 100, which is 1/4x as sensitive as ISO 400. With this setting, we again have a correct exposure.
- Change both shutter speed and ISO:
- You can also change both shutter speed and ISO, by going to 1/1000 and ISO 200. The new shutter speed lets in half as much light, and the new ISO is half as sensitive. Together, they amount to a 2-stop change in exposure, which properly compensates for the change in aperture.
With any of the above changes, you wind up with a correct exposure again.
But what if you want to change your shutter speed? Going back to the original ISO 400, 1/500, f/16 combination, maybe you want to stop the motion of a fast-moving subject, so you want as fast a shutter speed as your camera will allow. Let’s say your camera tops out at 1/4000. Compared to 1/500, that’s a difference of 3 stops. The camera is now letting in only 1/8x as much light. To compensate, you can:
- Change the aperture:
- Open up from f/16 to f/5.6 (3 stops difference), letting in 8x as much light.
- Change the ISO:
- Change from ISO 400 to ISO 3200. This gives you 8x the sensitivity.
- Change both the aperture and the ISO:
- Change from f/16 to f/8 (2 stops difference) and from ISO 400 to ISO 800 (1 stop difference). Together, these give a 3 stop change in exposure, compensating for the 3-stop change in shutter speed.
Finally, if you want to change ISO, you will again need to compensate. Let’s say you want to change from ISO 400 to ISO 100. This change means 2 stops less sensitivity (1/4x as sensitive), so you need to make up for that:
- Change the aperture:
- Open up from f/16 to f/8 (2 stops difference).
- Change the shutter speed:
- Use a slower shutter speed, changing from 1/500 to 1/125 (2 stops difference).
- Change both the aperture and shutter speed:
- Change to 1/250 (1 stop difference) at f/11 (1 stop difference). In total, this gives a 2-stop correction.
No matter which of the 3 variables changes, if you want to keep the same effective exposure, you’ll need to change one or both of the others. This is always true.
Compensating for Under- and Overexposure #
So we’ve looked at how to keep the same effective exposure, but what if you need to change the exposure? What if your image is too light or too dark? As good as today’s cameras have gotten, the camera’s meter doesn’t always get the exposure right.
If the image comes out too dark, that means it is underexposed. Not enough light is coming in and/or sensitivity is too low to get a proper exposure. To compensate, you can:
- Use a longer/faster shutter speed
- Use a wider aperture
- Use a higher ISO setting or film
- A combination of the above
If the image comes out too bright, on the other hand, that means it is overexposed. Too much light is coming in and/or sensitivity is too high to get a proper exposure. To compensate, you can:
- Use a shorter/slower shutter speed
- Use a smaller aperture
- Use a lower ISO setting or film
- A combination of the above
How much you’ll have to compensate depends on how underexposed or overexposed the image is. This will depend on the specific conditions at hand.
Note: In the future, I will be expanding this section with illustrations and more detailed explanation. Please leave specific questions you’d like me to address in the comments section at the bottom of the page.
A Note re: Exposure with Flash #
When using a flash, and when mixing flash and ambient light, controlling exposure becomes a bit more complex. This will soon be covered In a separate article, but for now, know that because of how brief the flash of light from a strobe is, shutter speed cannot be used to control exposure with flash. Instead, flash exposure is controlled through a combination of aperture and the power setting on the flash itself.
Secondary Considerations of ISO, Shutter Speed, and Aperture #
Illustrations will be added to this section
In this article, we’ve looked at the role of these three variables specifically in relation to exposure. They all have other effects on the final image, however. In the future, these will all be addressed in their own in specific technical articles, but for now here’s a summary.
ISO #
With both film and digital capture, the ISO used (of either the film itself or of the setting applied to the digital sensor), will have an effect on the look of the final image.
With Film #
Film uses light-sensitive silver halide crystals to capture an image. On average, larger crystals are more sensitive to light than smaller crystals. As such, slower (lower ISO) films tend to have finer grain and are able to capture more minute details, while slower (higher ISO) films tend to have coarser grain and capture less in the way of fine details. If you were to shoot the same scene with both an ISO 25 film and an ISO 3200 film, you would see a clear difference in the amount of detail captured.
As film technology has improved over the years, manufacturers have managed to improve the relationship between ISO and grain size, but the relationship still generally holds true. For example, while Kodak T-Max 400 (a newer film) has finer grain than Kodak Tri-X 400 (an older film) a the same ISO, it’s still going to have coarser grain than Kodak T-Max 100.
With Digital #
With a digital sensor, it works a bit differently. When you change the ISO setting on a digital camera, you aren’t actually affecting the sensor’s sensitivity to light, though the effect on exposure gives you that outcome. Essentially, changing ISO changes the amount of amplification that the camera applies to the signal generated by sensor. In real-world conditions, what we usually see is an increase in noise/grain as the ISO setting is increased.
As with film, improvements in digital cameras have brought improvements in high-ISO performance. For example, a Canon 5D Mk IV shot at ISO 3200 is going to produce a cleaner image than the original Canon 5D, introduced 11 years prior, shot at the same settings.
Shutter Speed #
Shutter speed has an effect on image sharpness, as it dictates how much of a role camera and/or subject movement plays during the exposure. In terms of both camera and subject movement, the longer the exposure/slower the shutter speed, the more potential there is for blur.
Camera Movement #
As steady as you may feel your hands are when holding your camera, you’re never going to be completely stable. Because of this, if you try to hand-hold a camera using too slow of a shutter speed, the camera is going to move enough during the exposure that the image will be blurred. It could be a little, it could be a lot. This can be used creatively, but in most circumstances, you want to get a sharp image free from blur, so you’ll want to favor shutter speeds that are fast enough to prevent it or use a camera support (tripod, etc) to help keep things stable.
Image stabilization technology, both in lenses and in camera bodies, can help compensate for camera movement, but there’s a practical limit to it.
Subject Movement #
Even if the camera is held totally motionless, you can still get a blurred image if the subject is moving too quickly to be frozen by the shutter speed. With stationary subjects like buildings, it’s not usually going to be a problem.
But what if you want to photograph something like a hummingbird? They flap their wings 70 times a second, and if you photograph them at something like 1/60 of a second, those wings are going to be blurred. It might be a nice effect, but if you want a crisp image that freezes the motion, you’ll want a shutter speed of 1/1000 or 1/2000 at a minimum.
As with camera movement, blur from subject movement can be used creatively, but in most cases you’ll probably want to stop the subject’s motion.
Aperture #
Aperture affects the final image in two ways: sharpness and depth of field.
Sharpness #
Some lenses are just sharper than other lenses and generally better able to produce a detailed image. However, your aperture setting is also going to affect the maximum detail the lens is able to resolve. If you have something like a 50mm f/1.4 lens, shooting the lens wide open at f/1.4 is going to let in a ton of light, making it great for night work, but it’s probably not going to give you maximum sharpness, especially towards the corners of the frame.
Most lenses will achieve their maximum sharpness/resolution at middle apertures of f/5.6 to f/11.
However, stopping down further to f/22, f/32, or beyond is again going to decrease sharpness. This is due to something called diffraction. Diffraction is always present in a lens and is an effect of light needing to move through the physical aperture of the lens. With smaller apertures, light waves begin to interfere with each other more, leading to a loss of resolution. The smaller the opening, the more interference you get.
There are other factors at play that I won’t get into here, and every lens is going to have its own ideal aperture setting for maximum sharpness, but it’s good to be aware that aperture does affect optical performance.
Depth of Field #
Depth of field refers to how deep the range of focus is, in terms of distance from the lens to the subject. Put simply, the larger the aperture (lower f-number, larger opening), the less DOF you’ll have, and the smaller the aperture (higher f-number, smaller opening), the more DOF you’ll have. Depth of field is often referred to in terms of being shallow or deep.
A portrait shot at f/2, for example will have shallow depth of field. The subject will be sharp, but the foreground and background will be blurred. This is a common approach to isolating or emphasizing the subject in the image.
On the other hand, if you’re shooting a landscape and want everything in focus, you’ll want deeper depth of field, requiring a smaller aperture.
Compared to sharpness, depth of field is a much more prominent effect of aperture, and has much more of an overall effect on the look of the final image.
It is worth noting here that depth of field is actually a function of aperture, lens focal length, and subject distance combined. However, regardless of the other two factors, changing the aperture will always reduce or increase depth of field.

